LXD 创建LVM以及手动指定IP (centos安装)
Centos安装参考,zfs可以不用运行,因为使用的lvm,需要把lvm的操作提前进行:
# Install snapd
yum install yum-plugin-copr epel-release -y
yum copr enable ngompa/snapcore-el7 -y
yum install snapd -y
service snapd start
systemctl enable --now snapd.socket

# Install ZFS (skip if you don't want it)
yum install http://download.zfsonlinux.org/epel/zfs-release.el7_4.noarch.rpm
yum-config-manager --disable zfs
yum-config-manager --enable zfs-kmod
yum install zfs

# Configure the kernel
grubby --args="user_namespace.enable=1" --update-kernel="$(grubby --default-kernel)"
grubby --args="namespace.unpriv_enable=1" --update-kernel="$(grubby --default-kernel)"
echo "user.max_user_namespaces=3883" > /etc/sysctl.d/99-userns.conf
reboot

# Install the LXD snap
snap install lxd

# source一下环境变量,因为刚安装还没生效
source /etc/profile

# Configure LXD
lxd init

# Launch containers
lxc launch ubuntu:16.04 c1
关于超售部分:
超售主要需要增加内存,一般是使用swap,swap参考:https://zhuanlan.zhihu.com/p/399986218
需要cat /proc/cmdline| grep swap查看swapaccount是否存在且为1
https://blog.csdn.net/qq_27037443/article/details/100050978
开启步骤
开启 memory and swap on system 使用 GNU GRUB (GNU GRand Unified Bootloader),步骤如下:
使用具有 sudo 权限的用户登录你的系统。
编辑 /etc/default/grub 文件。
设置 GRUB_CMDLINE_LINUX 的值如下:
GRUB_CMDLINE_LINUX="cgroup_enable=memory swapaccount=1"
保存并关闭文件。
更新 GRUB。
sudo update-grub && reboot
需要把磁盘先进行分区,可以不用mkfs,直接fdisk /dev/nvme1n1,n p 1 回车回车 wq即可
大于2T的磁盘需要parted改成gpt
parted /dev/nvme1n1
mklabel GPT
mkpart primary 0% 100%
quit
partprobe
然后安装:
sudo yum install lvm2 device-mapper-persistent-data
1、先创建pv
pvcreate /dev/nvme1n1p12、创建vg
vgcreate lxd_vg /dev/nvme1n1p13、lxd增加存储
lxc storage add lxd_pool lvm source=lxd_vg4、检查添加成功没
lxc storage ls5、此时可以控制容量了
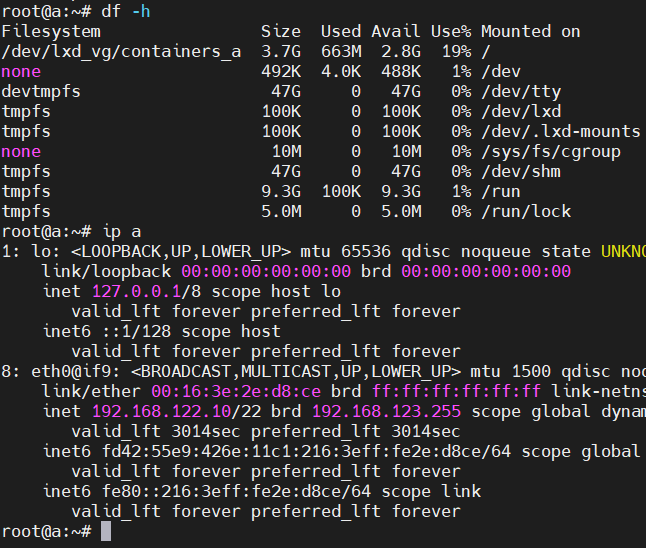
lxc config device override instance-name root size=4GB5、手动指定IP
lxc network attach lxdbr0 a eth0 eth0
lxc config device set a eth0 ipv4.address 192.168.122.10
任何device的修改都需要restart容器
测试
dd if=/dev/zero of=/data01/test.dbf bs=8k count=200000 conv=fdatasync6、IPv6设置
lxc network set lxdbr0 ipv6.address=2a12:aaaa:aaaa::1/64 ipv6.nat=false
7、其他限制
lxc config set a limits.cpu 1
lxc config set a limits.memory 512MB
lxc config set a limits.cpu.allowance 30%

参考:
https://discuss.linuxcontainers.org/t/lxd-on-centos-7/1250
https://discuss.linuxcontainers.org/t/using-static-ips-with-lxd/1291/5
https://discuss.linuxcontainers.org/t/how-to-set-root-device-size-when-creating-new-instance/15911/2